Welcome! I am so happy you chose to gather around my table. My name is Mia Swinehart and I am a registered dietitian with a passion for simple healthy recipes, women's hormonal health, and overall wellness!
My sourdough starter schedule, made simply from bread flour and water! With a few other tools, you can make your own starter, too, to become addicted to making fresh bread at home like I am 🙂
While I certainly don’t consider myself an expert by any means (I’m still learning a lot every day!), this process has worked really well for me while feeling super easy and approachable!
First, here’s what you’ll need to make your own sourdough starter:
Glass jars. I love these ones for this purpose, but use whatever you’ve got and like! I also like these for saving sourdough discard in the refrigerator for discard recipes.
Glass jar covers. You can certainly just use plastic wrap or a clean dish towel, but I love this option! Whatever you use to cover your jar, just make sure your starter can steal breathe (so, don’t completely seal your jar with a lid).
Bread flour. There are tons and tons of sourdough starter approaches to take, this is just the version that has worked best for me! So, if you’re following my approach then we’ll be sticking with bread flour!
Filtered water. I have an AquaTru filter at home; tap water can prevent the starter from becoming active so just be sure it’s filtered!
What I use to actually bake my sourdough loaves:
Bread oven. This is so perfect for making a round loaf of sourdough, but you can also just use a dutch oven!
How will I know when my starter is ready to bake with?
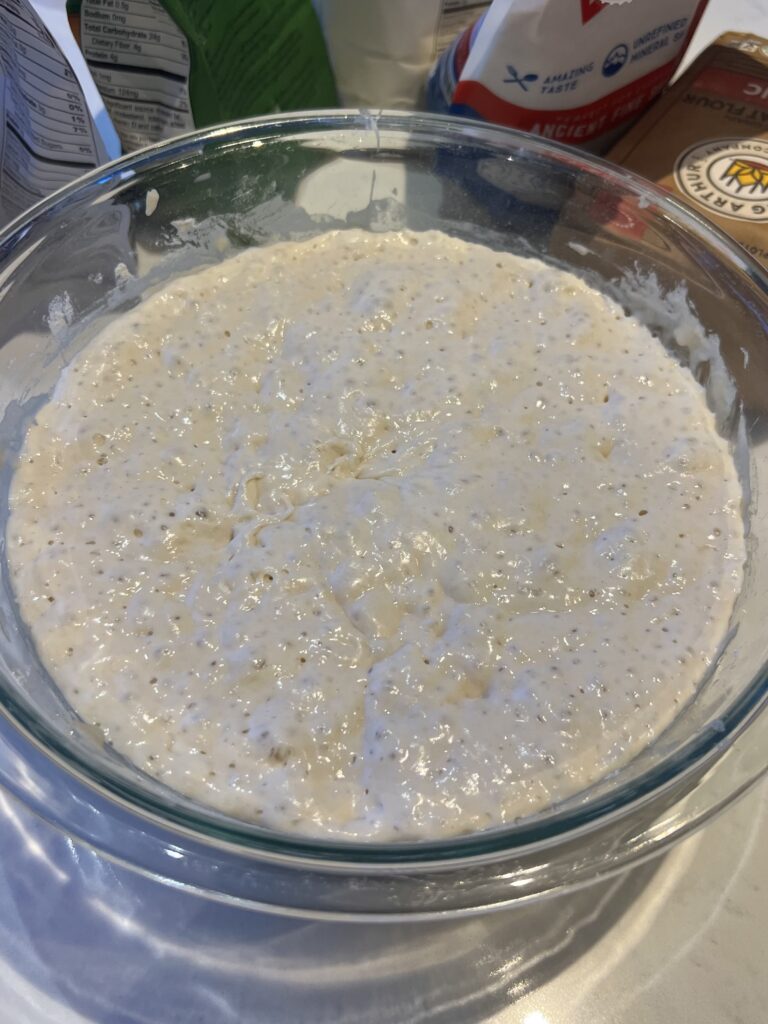
Your starter is ready when it doubles in size (usually 4-7 hours after a feeding), has lots of bubbles of different sizes, a fluffy texture, and a more acidic or sour smell. To test if your starter is ready to bake with, you can drop a small amount into a cup of lukewarm water and see if it floats!
You may begin to see an increase in volume and bubbles develop early on, but keep going for at least a full week! This is a good sign, but your starter is likely not actually ready to bake with.
It’s super important to note, yours may take another 7-10 days to get to this point, which is totally fine! It can depend on the temperature of your home, the climate you live in, etc. Don’t give up and continue the same process until you see your starter has doubled in size and looks super active and bubbly!
How do I store my starter once it’s ready?
If you plan to bake with it multiple times a week, then keep your starter out in your kitchen or in a cabinet and continue to discard and feed it every day.
If you plan to only use it once a week, then you’ll seal your jar and store it in the refrigerator. Feed it once a week; do so by letting it sit at room temperature for an hour or so before discarding and feeding.
I know this all may sound a little confusing and overwhelming at first, but TRUST ME when I say it is so easy and will quickly become second nature to you! Don’t give up!!
Beginning your sourdough journey:
And now, for the sourdough starter schedule! Your sourdough starter is what will actually leaven and flavor your sourdough bread. It’s the way you will be able to naturally make a loaf of bread, without any added yeasts or other leavening agents. Essentially, it’s bread magic, made with just flour, water, and love! 🙂
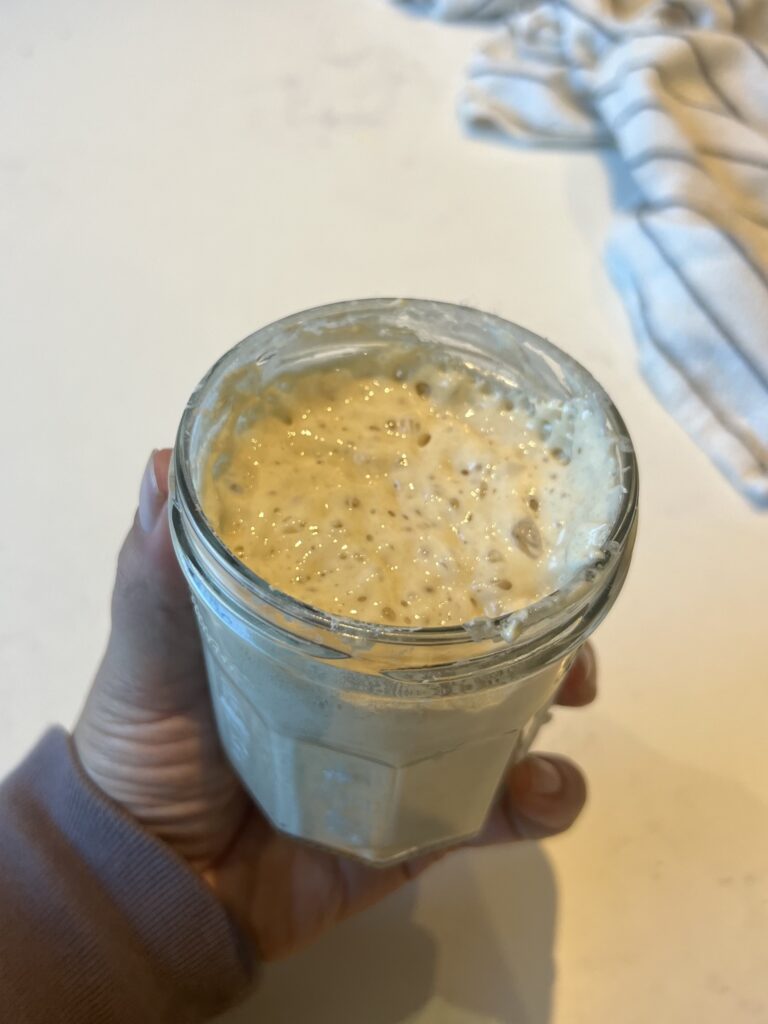
Day 1: In a clean jar, weigh out 60g of bread flour and 60g of filtered water. Mix together thoroughly, then cover with a cloth jar lid, a clean kitchen towel, or plastic wrap. Set the jar in a warmer area in your home.
Day 2: Do nothing! You can check on your starter to see how it’s looking, but we won’t add or discard anything for the first 24 hours. Continue to leave it be in it’s cozy spot until tomorrow!
Day 3: 48 hours after making your starter, discard approximately 1/2 of your starter mixture*. Weigh out your remaining starter in a new jar; you should have about 60g of starter left, give or take. Feed this starter with the same exact amount of flour and water as you have starter. (Ex: if you have 62g of starter leftover after discarding, then feed this with 62g of bread flour and 62g of filtered water). Stir, cover again, and place jar back in it’s spot.
Days 4-7: Repeat the same exact process as you did on day 3. Discard half, then feed it with the exact amount of flour and water. Stir, cover, and let rest. Your starter may develop small bubbles, a funky sort of smell, and become runnier at some point. All normal and good signs! If yours develops a layer of liquid at any point, you can discard that (this is normal and called hooch).
Your starter is ready when it doubles in size (usually 4-7 hours after a feeding), has lots of bubbles of different sizes, a fluffy texture, and a more acidic or sour smell. To test if your starter is ready to bake with, you can drop a small amount into a cup of lukewarm water and see if it floats! Note, yours may take another 7-10 days to get to this point, which is totally fine! It can depend on the temperature of your home, the climate you live in, etc. Don’t give up and continue the same process until you see your starter has doubled in size and looks super active and bubbly!
Notes
*Later on when your starter is active, you can save your discard for sourdough discard recipes. For now, though, we will not save any of the discard.
Did you make this recipe? Be sure to tag @gatherednutrition on INstagram so I can see what you made! Leaving a rating and review on the site is a huge help too!
Your sourdough routine sounds so interesting! While taking a break after baking some bread, I stumbled across the playjonny bonus on a forum. I started playing Gates of Olympus and went through a few rounds of small losses that almost made me give up. Then I upped the ante and triggered a bonus round that gave me a nice win and completely lifted my spirits. With the bonuses for all new spanish players, it was really easy to get started, and I’d recommend it if you want to unwind for a while after your homemade bread experiments.


Recipe for sourdough bread
You say twice ‘see if it floats’ but don’t say if that’s desirable or not!
★★★
Your sourdough routine sounds so interesting! While taking a break after baking some bread, I stumbled across the playjonny bonus on a forum. I started playing Gates of Olympus and went through a few rounds of small losses that almost made me give up. Then I upped the ante and triggered a bonus round that gave me a nice win and completely lifted my spirits. With the bonuses for all new spanish players, it was really easy to get started, and I’d recommend it if you want to unwind for a while after your homemade bread experiments.